A Concise Guide on How to Install CCTV Cameras
Closed-circuit television system, or a CCTV system, is an excellent way to monitor businesses and commercial properties that need security cameras. They can help you catch perpetrators and show you the vulnerabilities of your existing security camera system.
Here’s a two-point guide on whether or not you need a CCTV system:
- If you have a business, then you definitely need a CCTV system.
- If you’re on the fence on whether or not your home needs CCTV surveillance, then it does. Better safe than sorry.
If you fall in one of the above two categories who need a CCTV system but are afraid of getting tangled in a huge mess of wires, this guide is for you. Follow this concise guide and your home and business will be safer in no time.
Preparing for the CCTV Installation
-
Assessing your requirements
It’s not realistic to monitor every square inch of your property. You’ll need to prioritize the areas you want to monitor the most if you want to survey your property efficiently. The easiest way to do this is by drawing a rough diagram of your property or printing out the blueprints and analyzing the best camera positions.
-
Security cameras
The previous step should have given you a rough idea of how many cameras you’ll need. Now you know if a bundled security system with a preset number of cameras will work for you or if you should buy cameras individually.
Next comes the type of cameras you’ll use in your video surveillance. Whether all your cameras are of the same type of not, you’ll need to consider various factors like indoor/outdoor placement, lighting, ideal resolution, and field of view to pick the right type(s). Here are your options:
- Bullet Cameras – These are tubular security cameras that mount to your wall or ceiling with a tri-axis mount. They can have night-vision and IR capabilities.
- Dome Cameras – These cameras have a better field of view and blend much more into the environment.
- Fisheye Cameras – These cameras offer a focused look at a wide field of view. They’re also self-contained and less susceptible to failures.
- PTZ Cameras – Pan Tilt Zoom Cameras are highly versatile cameras that can zoom and focus on faces or license plates in real time, cycle through different orientations using a program, track a person or a car across a range, and respond to user inputs even from off-site network connections.
- Turret Cameras – These cameras can be repositioned on the fly and work great in low-light and infrared conditions.
- Doorbell Cameras – These cameras combine the benefits of a security camera and an intercom by using a door buzzer and a 2-way intercom in the frame.
- Multiple Sensor Cameras – This type of camera uses several discrete sensors and picture channels to capture a 360-degree field of view and stitches the channels to provide a contiguous feed.
- Wireless Security Cameras – These cameras are great for monitoring small to medium-sized rooms and buildings as they have easy remote access, less wiring, and simpler installation.
-
Cables and wires
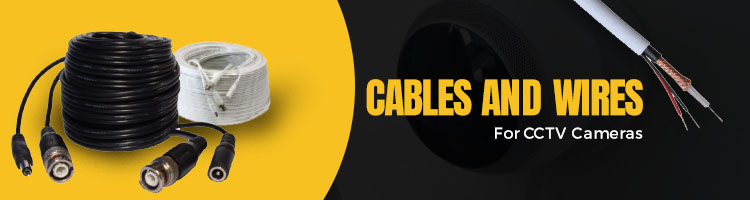
While you can skip the hassle of wires and cables by installing wireless security cameras, wired ones are still supreme when it comes to more long-term and demanding security use. Among wired systems, you should prefer Cat5E or Cat6 cables over traditional coax cables. Cat5E and Cat6 cables support IP cameras and are capable of transferring large amounts of data required by digital video and high resolutions at high speeds and over long distances.
-
NVR and DVR
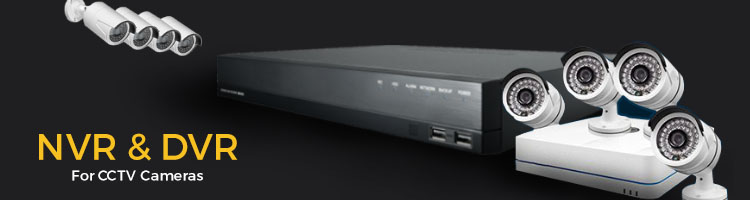
An essential part of your video surveillance is the recording system. It’s responsible for recording and storing video on a hard drive, snapping images and transmitting them to your computer or remote device for recorded or live viewing.
You have two options for a recording system: an NVR and DVR. NVRs record video from IP cameras but are more expensive and require some technical knowledge to set up. DVRs record analogue-based video to a digital format but are cheaper and easier to set up.
-
Storage
You need hard drives to store the recorded footage. Calculate the length of the video you need to store by using parameters like bitrate and resolution. This will give you a clear idea of how much storage you’ll need.
Having done this, you’re prepared to install a CCTV system. Before you start, test your equipment by connecting your cables, DVR, cameras, and monitor.
Installing Your Security Camera
[Step 1] Choosing an angle
You want your camera to have a high, broad angle. For an indoor camera, the most suitable angle is usually looking down from the corner where the ceiling meets the walls. Ensure that it covers all entries and exits.
If placing outside, use trial and error method to make sure you’re recording the exact angle you want to. Remember to place it above 10ft so that it cannot be easily knocked down.
[Step 2] Mounting your camera
You can use the sticky pads that come with the camera to adhere it to the wall, but the safest way to do it is by screwing it to the surface. Follow the standard screwing process: place the mount in the desired location and mark the holes, drill holes and hammer the moulding pins, and screw the mount to the wall, and position the camera to the desired angle.
[Step 3] Powering your camera
Most cameras have a power adapter that can be plugged into a normal wall socket. Plug the small, round end into the power input into the camera and the other end into the outlet.
[Step 4] Connecting to the DVR
Assuming you chose a DVR as your recording system, you can use BNC cables to connect your surveillance equipment — one end goes into your camera’s “Output” and the other goes into the DVR’s “Input” port.
[Step 5] Making wireless connections
When installing wireless cameras, a software disc will guide you through the steps to link your camera to your computer. Make sure to note down the camera’s IP address if it’s provided. You can use this number to access your camera’s feed remotely from any browser.
[Step 6] Attaching the Monitor to the DVR
The monitor is where you’ll be accessing and watching the camera feed. You can connect it to to the DVR using a BNC cable, though some systems can even make use of HDMI cables and coaxial cables. Connect one end to the monitor’s “Input” and the other to the DVR’s “Input”. The number of DVR inputs available is the number of cameras you can hook up.
[Step 7] Troubleshooting connections
Once you’ve finished the CCTV installation process, you should be able to watch your camera feed on your screen. If not, make sure that the camera, monitor, DVR, and all other components are connected to a power supply and turned on. Check that your cables are attached securely and that you’ve selected the correct inputs for your DVR and monitor.
Conclusion
That’s all there is to installing a CCTV system. Of course, if you’re creating a surveillance hub with a lot of cameras, trying to power multiple cameras through a single outlet, hide your wires and keep them safe, or trying to install hidden cameras, there will be some more compilation. In such circumstances, it’s best to take assistance from security specialists. But whether you go for a hub or not, you can rest assured that your property is safe and secure.